A Plate Heat Exchanger Gasket may look like a narrow strip of elastomer. In service, it separates hot and cold fluids, withstands pressure, and helps prevent costly leakage. Choosing one by price or appearance alone is a gamble.
The U.S. Department of Energy’s Industrial Decarbonization Roadmap identifies process heat as a major industrial energy challenge. That context makes reliable heat transfer and maintenance decisions matter. The ASHRAE Handbook also treats gasketed plate exchangers as equipment whose performance depends on operating conditions and design. Heat-transfer authority Ramesh K. Shah’s published work on compact heat exchangers reinforces a practical principle: exchanger design must be matched to its thermal and operating requirements. That is not a direct quotation; it is a summary of the engineering point.
A sound gasket choice starts with the details on the nameplate and in the process data. Check the fluid, concentration, cleaning chemicals, temperature, pressure, and expected cycling. Then confirm the gasket profile and material against the exchanger manufacturer’s specifications. EPDM, NBR, and FKM are not interchangeable; each has limits. Small differences matter.
There is no universal best gasket. A material that works well with water may fail in oil or aggressive cleaning solutions. And the service history may be incomplete. Inspect the old gasket, but do not treat it as proof that the previous choice was correct. The right selection is the one supported by documented compatibility, realistic operating conditions, and a clear maintenance plan.
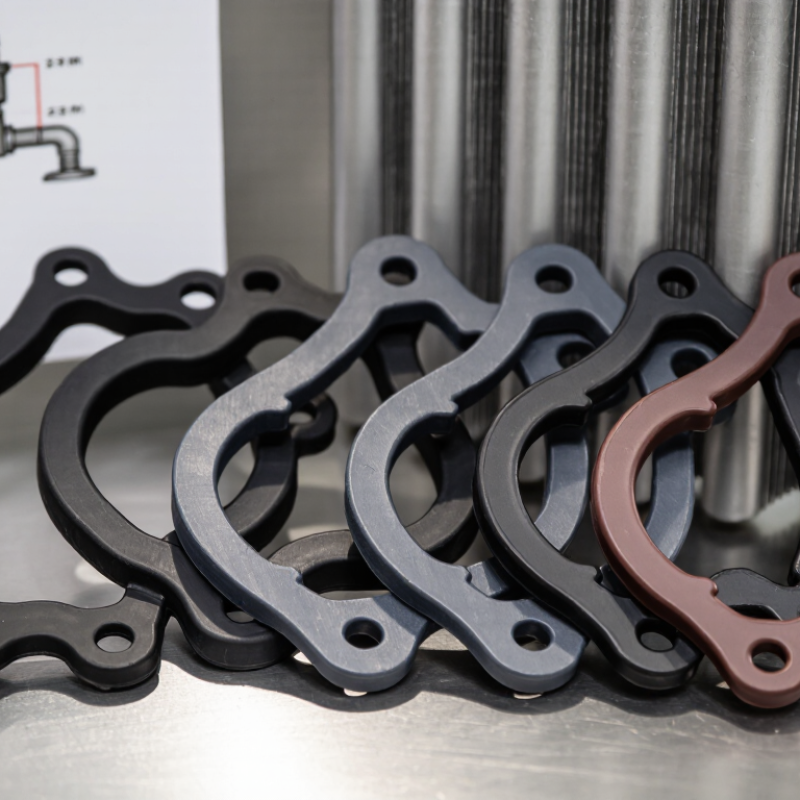
A plate heat exchanger gasket does more than sit between metal plates. It seals each channel, directs hot and cold fluids along their intended paths, and helps prevent mixing. Small part. Big responsibility. Its shape and seating position also influence flow distribution and leak tightness.
During inspection, look for flattened sections, cracks, swelling, hardening, or edges that have pulled away from the groove. A gasket may appear sound while losing elasticity; visual checks alone are not enough. Temperature cycles, pressure changes, fluid chemistry, and cleaning agents all affect its condition. Check compatibility against operating data and the gasket material’s documented limits. Do not choose by temperature rating alone. Concentration and exposure time matter, too.
Installation matters just as much. Clean the plate groove, remove residue without scratching the surface, and check that the gasket sits evenly before closing the plate pack. Uneven compression can create a leak path, even with a suitable material. Follow the specified tightening procedure and inspect the exchanger after startup. It is tempting to blame the gasket quickly, but plate alignment or assembly pressure may also contribute. That possibility deserves a second look.
Compare gasket materials against the fluid, operating temperature, pressure, and cleaning conditions. Temperature ranges below are typical reference ranges only; actual limits depend on the specific compound, exchanger design, and operating conditions.
| Gasket material | Typical temperature range | Commonly suitable for | Key strengths | Important limitations | Often considered when |
|---|---|---|---|---|---|
| EPDM | Approximately −30 to 150°C | Hot water, water-based solutions, glycol mixtures, and some dilute acids or alkalis | Good resistance to water, weathering, ozone, and many polar chemicals | Generally unsuitable for petroleum oils, fuels, and many hydrocarbon fluids | Water and HVAC duties, subject to fluid and temperature verification |
| NBR (Nitrile) | Approximately −20 to 110°C | Mineral oils, lubricating oils, and some fuel-containing services | Good resistance to many oils and generally cost-effective | Limited resistance to ozone, weathering, and some chemicals; temperature limits vary by compound | Oil service within the selected compound’s temperature and chemical limits |
| HNBR | Approximately −20 to 150°C | Many oils, fuels, and selected industrial fluids | Often offers improved heat, wear, and aging resistance compared with standard NBR | Compatibility is formulation-specific; not suitable for every chemical or high-temperature water duty | Oil-related service requiring a broader operating margin than standard NBR may provide |
| FKM (Fluoroelastomer) | Approximately −20 to 180°C | Many oils, fuels, and selected solvents or chemicals | Good heat and chemical resistance across many applications | May be unsuitable for hot water, steam, amines, or certain chemicals; verify the exact compound | Higher-temperature oil or chemical service after compatibility review |
| Silicone | Approximately −50 to 180°C | Selected food, beverage, and hot-water applications where the compound is approved | Broad temperature flexibility and good flexibility at low temperatures | Often has lower tear and abrasion resistance; generally poor resistance to many oils and fuels | Applications prioritizing temperature flexibility or requiring a suitable food-contact grade |
| CR (Chloroprene) | Approximately −20 to 120°C | Selected water, refrigerant, and moderate oil applications | Balanced resistance to weathering and moderate oil exposure | Not a universal chemical-resistant material; verify refrigerant and lubricant compatibility | Selected refrigeration or general industrial duties where compatibility is confirmed |
Selection checklist: Confirm the exact process fluid and concentration, normal and peak temperatures, pressure, cleaning chemicals, and any food-contact requirements. Check the heat exchanger manufacturer’s approved gasket specifications, since material names and allowable limits alone do not guarantee compatibility or performance.
It seals channels between metal plates and keeps hot and cold fluids on separate paths. Small part, big responsibility.
Look for cracks, swelling, hardening, flattened sections, and edges lifting from the groove. Looks fine? Not always. A gasket can lose elasticity before visible damage appears.
Record the exchanger model, serial number, design pressure, plate count, plate pattern, and port arrangement. Compare these details with service records or a verified drawing. A near-match can still be wrong.
Note the fluid, concentration, normal and peak temperatures, pressure, and cleaning chemicals. Check these conditions against documented material limits. Temperature alone is not enough; exposure time matters too.
Compare its profile, thickness, port rings, corners, and groove with an original plate or verified drawing. Check under good light. I still wouldn’t trust appearance alone.
Clean residue from the groove without scratching the plate. Seat the gasket evenly, then follow the specified tightening procedure. Check the exchanger after startup.
Replacement timing depends on operating conditions, so a fixed interval may mislead. Inspect removed gaskets for flattening or chemical damage. If several show similar wear, check maintenance guidance before mixing old and new seals.
No. Plate alignment or assembly pressure may also create a leak path. Check those possibilities before blaming the gasket. A second look can save rework.
Choosing the right Plate Heat Exchanger Gasket starts with understanding its role: it seals the channels between plates, helping keep fluids separated and maintain efficient heat transfer. Before selecting a replacement, identify the exchanger model and confirm the required gasket shape, dimensions, and installation specifications. A gasket that does not match the plate arrangement may cause leaks or reduce performance.
Next, compare gasket materials against the operating temperature, pressure, and fluids involved, since chemical compatibility and service conditions affect durability. Consider the gasket design and attachment method as well, including how easily it can be installed and secured. Before fitting a new gasket, check its dimensions and compatibility with the exchanger, and inspect the plates for damage or residue. Replacing worn, hardened, or deformed gaskets promptly can help restore a reliable seal and support consistent exchanger operation.

 Flotte Energy